The first moment you notice your eyebrows looking thinner can feel unexpectedly important. It might happen under unforgiving bathroom lighting or in a casual selfie where your eyes suddenly appear less defined. The ends seem faded, the arch vanishes from certain angles, and no brow pencil quite fills the gap. That’s usually when the idea of a salon brow lamination pops up. Then come the thoughts of booking appointments, spending money, traveling, and dealing with strong chemical smells. Eventually, you close the tab, rinse your face, and decide there has to be a simpler way.

A Calm and Personal Approach to Shaping Your Own Brows
There’s a quiet satisfaction in sitting at your bathroom counter late at night, the fan softly buzzing, music playing low, and realizing you can change your brows on your own. No harsh lights. No forced conversation. Just you, a mirror, and a small brush. At-home brow lamination may sound complicated, but the concept is actually simple. You’re gently guiding your natural brow hairs to rest in a more flattering direction so they appear fuller and more defined. You aren’t creating a new shape—you’re helping your existing brows show their best side. Once the intimidating terminology is stripped away, the process becomes clear: soften the hairs, shape them, set them, and nourish them afterward. When you understand this pattern, it turns into an easy routine you can repeat every few weeks.
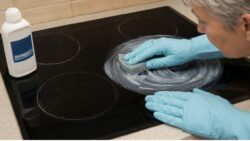
 Remove Scratches From Glass Cooktops at Home Using Smart Techniques That Avoid Replacement
Preparing Your Brow Tools Like a Small Self-Care Ritual
Before touching your brows, it helps to prepare your space. Clear a section of your counter and remove anything distracting. Lay out your tools in the order you’ll use them. This small step creates a sense of ease that makes the process feel almost meditative. Most at-home lamination methods rely on only a few essentials. Some people choose full brow lamination kits, while others use gentle alternatives already available at home. These can include mild lash-lift products or soft-setting formulas labeled safe for the eye area. No matter the option, the principle stays the same: use minimal product and always choose the gentlest method. Standing in front of your mirror with these simple tools feels less like a major procedure and more like thoughtful daily care.
A Slow and Intentional Brow Lamination Process
Your first at-home lamination attempt should be unhurried. Move slowly enough to notice small details—the temperature of the water, the coolness of your fingertips, the light brushing sound as a spoolie passes through your brows. The goal isn’t only the final look but also the calm moments you give yourself during the process.
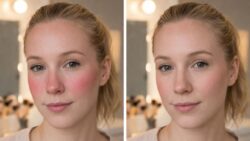 Facial Balance Tip: Why Incorrect Blush Placement Near the Nose Disrupts Overall Face Harmony
Start with a completely clean brow area
Brows collect residue from sunscreen, moisturizer, makeup, and even natural oils. Begin by cleansing the area with a gentle, fragrance-free cleanser. Rinse with lukewarm water and pat dry using a soft towel. Run a cotton pad lightly over the brows to remove any remaining residue. When brows are truly clean, each hair lifts more naturally, making them easier to shape.
 At-Home Eyebrow Tinting Made Simple With an Easy Step-by-Step Process for Soft Defined Brows
Observe how your brows naturally grow
Before applying any product, take time to study your brows. Use a clean spoolie to brush them upward and see how each hair behaves. Some will stand straight, others angle sideways, and a few may resist completely. Notice sparse areas, the thickness of the tail, and any uneven growth near the arch. Understanding these natural patterns helps you work with your brows instead of against them.
Gently soften brow hairs for shaping
Using a micro brush or cotton swab, apply a small amount of your lamination or lifting solution directly onto the brow hairs, avoiding the skin as much as possible. This step works like softening clay before shaping it. The product loosens the hair structure so it can hold a new position. With a spoolie, brush the solution through your brows, guiding the hairs upward and slightly outward based on your earlier observations. Move carefully and patiently. You’ll notice the hairs beginning to stay where you place them. Let the product sit for the time recommended in the instructions, usually just a few minutes. If your brows are fine or delicate, less time is always safer than more.